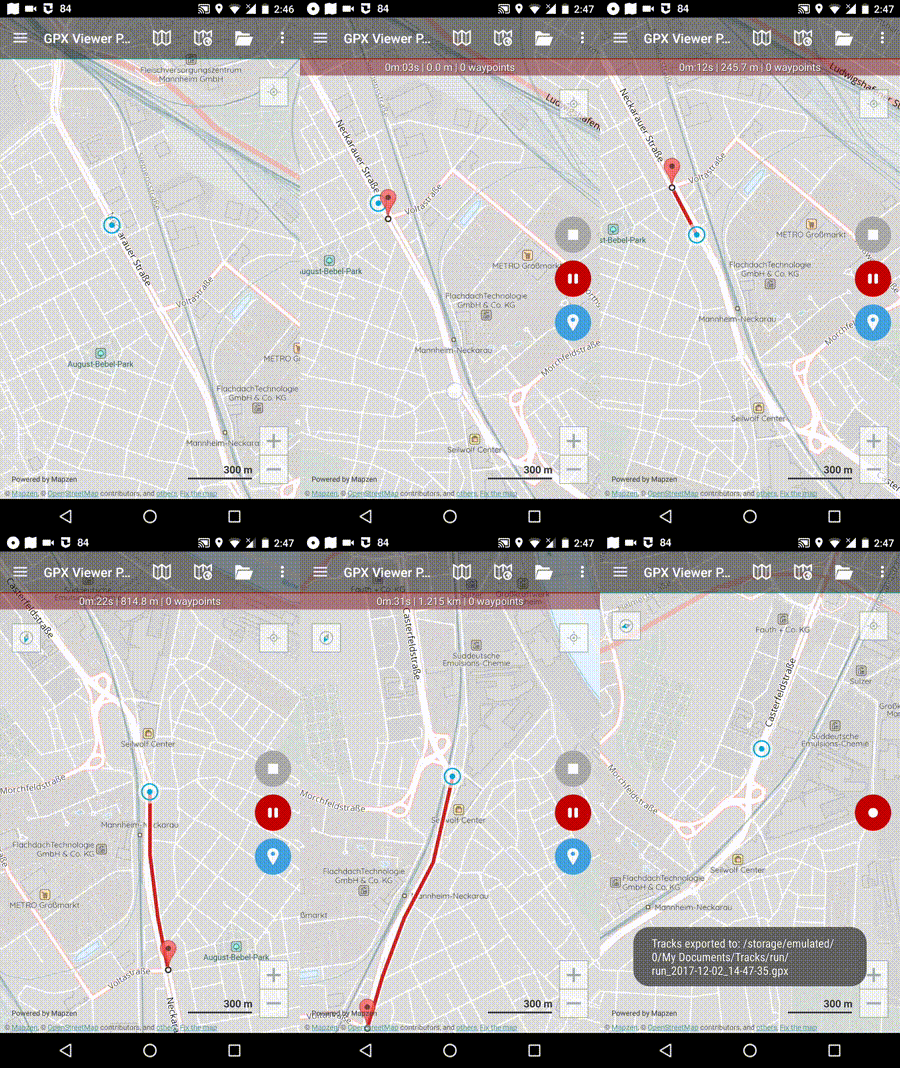
How to record and export track
The track recording feature is available only in GPX Viewer PRO. So this how to won't work in the free version of GPX Viewer.
Below are steps describing how to record and export tracks in GPX Viewer PRO:
- First off you need to start GPX Viewer PRO.
- Ensure that GPS is enabled on your device.
- If you have Android 6.0 or higher ensure also that GPX Viewer PRO has permission for location granted.
- Open the left main menu and tap on Track recording button. This will show a red recording button in the middle of the right edge of the GPX Viewer PRO screen.
- Tap on the red recording button in the middle of the right edge of the GPX Viewer PRO screen.
- Note that when the device is connected to the internet and option Elevation from air pressure in GPS in Settings is enabled (it is enabled by default after installing GPX Viewer PRO), GPX Viewer PRO will determine and record track with elevation computed from air pressure. When you are recording track in a closed environment eg. in the car with closed doors and windows GPX Viewer PRO won't record elevation correctly. In this use case it is needed to disable option Elevation from air pressure.
- You can alternatively enable Follow GPS and Rotate map functions in the left main menu to continuously move the map to devise position and rotate it according to device orientation. Also when you open the left main menu and tap on Settings then on GPS you can enable or disable the Rotate map according to GPS option. You can also enable or disable Move to lower part of the screen which will enable or disable moving position on a map to the lower part of the screen.
- When you want to stop recording the track tap on the gray stop button in the middle of the right edge of GPX Viewer PRO screen.
- Then dialog with entering name for the track will be shown. Enter the track name and tap on OK button.
- If you have Android 6.0 and higher, you will be asked to grant GPX Viewer PRO permission to store if you haven't done this already. If you don't grant GPX Viewer permission to store in Android 6.0 and higher, it cannot export recorded tracks into a file. Next, navigate to the directory into which you want to export the track and tap on the Confirm button.
- Next you can enter track file name and description and file type (gpx or kml) and tap on OK button.
- It will export your track to desired file format and directory and show the path to this file in a short text message at bottom of the screen.
IMPORTANT NOTE
If you have Android 6.0 and higher, battery optimization is used and the Android system restricts app running time in the background. When you turn off the display while recording a track in GPX Viewer PRO it may not record anything or record only some points. In this case, you need to turn off battery optimization and also turn off battery saver mode. Also please have a look at this website dontkillmyapp.com as it can help you resolve these problems too.
If you have Android 10 and higher, please ensure that you have granted GPX Viewer PRO permission to always access the location in order for recording to work properly when GPX Viewer PRO is in the background or when the device screen is turned off. You can read more in this article Google to put a muzzle on Android apps accessing location data in the background.
Greenify app can also kill GPX Viewer PRO while recording so you need to disable battery optimization in Greenify in order for recording to work properly while the screen is off.
You can also use Memory Locker and GPS Locker when you still have issues with track recording. GPS Locker will ensure that when the screen is off GPS signal won't be lost so GPX Viewer PRO should record track properly.
If you still have issues after trying all of the previous methods, it is possible that using some GPS apps like GPS Status & Toolbox may prevent GPX Viewer PRO track recording from being in doze mode.
Below is a video showing the instructions above:
