This is an old revision of the document!
How to show graph below map
This how to assumes that you have already opened gpx or kml file in GPX Viewer. If you haven't opened it yet here is How to open gpx or kml file.
Below are step by step instructions how to show graph below map. However these instructions won't work if you have previously disabled showing this graph below map by selecting none option. If you have disabled it, in GPX Viewer open left main menu, then tap on Settings, then tap on Track/route and in section Graph tap on Show graph with data below the map and select some option.
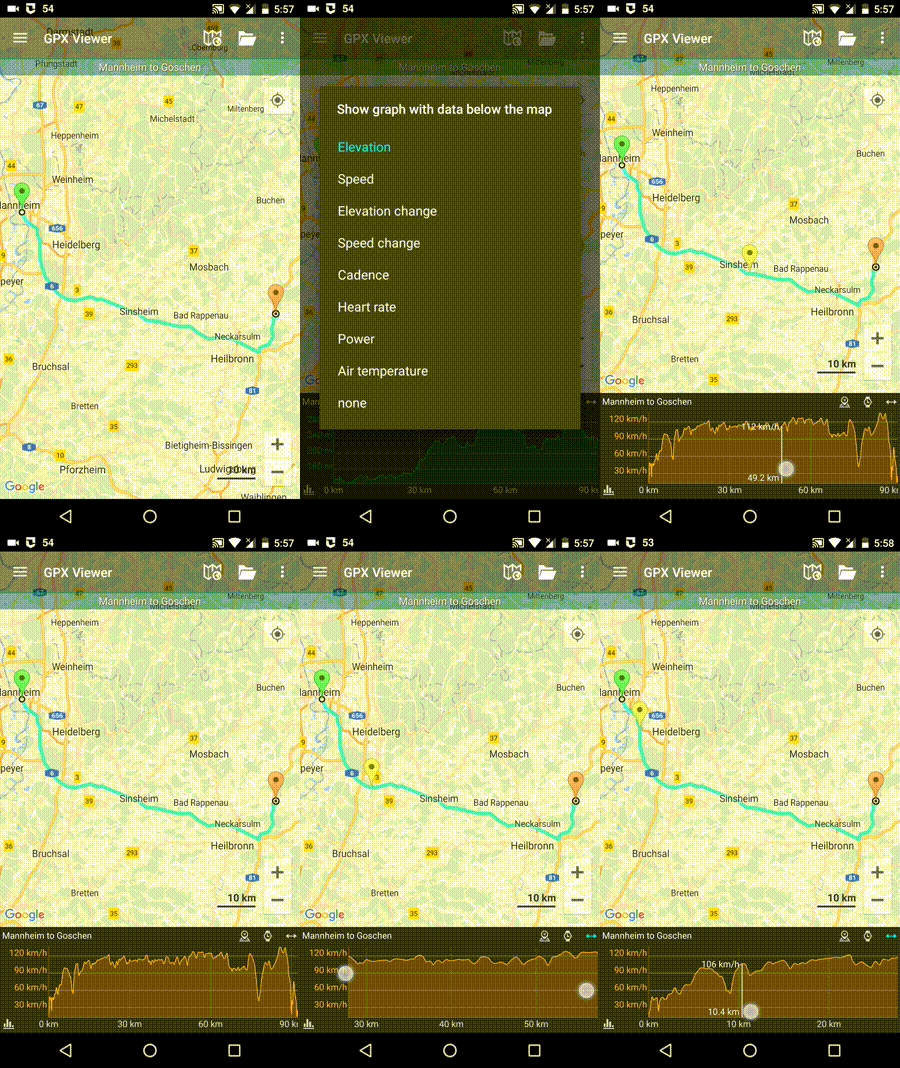
- To show graph below map simply tap on desired track/route line for which you want to show graph.
- Graph is shown below map if it contains some data. There are several types of data, but most basic are elevation and speed. If track/route does not contain these data no graph will be shown, just empty space with text No data.
- To show other type of data on graph, just tap on button showing three bars in bottom left corner. It will show you dialog with selection of various data.
- By tapping on graph you can show position on track/route line.
- By tapping on two arrows button in top right corner of graph you can enable scaling of that graph. Scaling can be done by double tapping and moving fingers. By single tapping you can move that scaled graph.
Below is video showing following instructions above:
