This is an old revision of the document!
Create & Edit
Here you can find step-by-step instructions on how to create and edit viewpoints or tracks with GPX Viewer PRO.
How to create a waypoint:
- Open main left menu.
- Tap Waypoints button.
- Tap Create & Edit button.
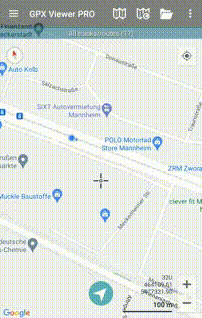
- This action will enable Create & Edit mode and will bring you back to the main screen.
- On the right side you will see 3 new buttons - trashbin, + button and arrow pointing right. On the bottom of the screen you can find a waypoint button.
- Centralize the crosshair on the point you want to locate your waypoint at.
- Press the Waypoint button at the bottom of the screen.
- Choose the method of saving the waypoint (Opened file, Trackbook, Local).
- Change the name, description, icon or the picture of the waypoint and save the changes by pressing “ok”.
How to create a waypoint:
- Open main left menu.
- Tap Waypoints button and choose the waypoint on the screen, or tap Waypoint info and choose the waypoint from the list.
- This brings you to the waypoint details page. You can find more details on edit waypoint metadata here.
How to create a track:
- Open main left menu.
- Tap Create & Edit button.
- This action will enable Create & Edit mode and will bring you back to the main screen.
- On the right side you will see 3 new buttons - trashbin, + button and arrow pointing right. On the bottom of the screen you can find a waypoint button.
To start creating a track you need to:
- Centralize the crosshair on the point you want to start the track with.
- Once you found the correct point, press the “+” button on the right side of the screen, which will record the point on the screen.
- Then move the map to again keep the crosshair in the position you want to add to the track next.
- In case you want to add the track-point based on the coordinates, you can click on the coordinates next to the zooming buttons in the bottom right corner of the screen. This will open a popup window that allows you to edit the coordinates.
- After you have chosen the point press the “+” button again and repeat this procedure until you add all of the trackpoints of your track.
Special actions:
Adding a trackpoint/waypoint from the coordinates:
- Tap on the coordinates next to the zoom buttons in the bottom right corner of the screen.
- Edit the coordinates in the popup window.
- Press “ok” to display the coordinates location on the screen
- Press “+” or a Waypoint button to save the point.
Long tap on the Trashbin button:
- In the case of non saved track, it deletes the whole track.
- In case of saved track, it removes all the changes done since last saving.
Long tap on the “+” button:
- Splits the track in 2 (if the trackpoint you are tapping from is between second and last).
- Creates a new segment on the track
Long tap on the Right arrow button:
- Merges the current segment with the next segment of the track (if located on the last trackpoint of segment, when there is a following segment)
- Merges the current track with another track ( the tracks can be only merged with the tracks that are stored with the same method = opened, trackbook, local).